One of the most exciting phases of any renovation or home finishing project is the planning stage. This is where you get to draw inspiration from a range of sources, collect ideas, and go hunting for options.
Of course, this phase can also be overwhelming. From flooring and paint to cabinets and countertops, with so many styles to choose from it can be daunting to narrow down your choices. Plus, even if you think you like a certain colour of paint or certain style of floor tile, it can be hard to picture how it will look in your space.
This is where the Tile Town Visualizer can help. With a few clicks of your mouse or taps of your finger, you can see how different combinations of flooring, cabinetry, and even countertops look — either in your space or a pre-set scene.
If you haven’t taken the Visualizer for a spin yet, here’s a quick look at how it works.
Getting started
To get started, visit the Visualizer page on the Tile Town website, either from a PC, laptop, tablet, or smartphone. From there, you can choose from a wide range of pre-set scenes or upload an image of your own space. You can also access “My Projects,” where you can either login or create an account to save your scenes and access them later.

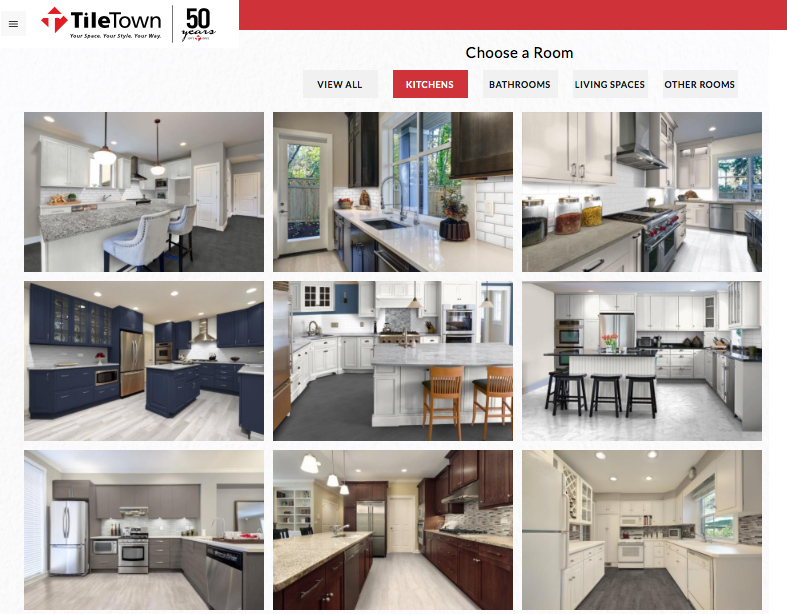
Select a scene
The fastest way to get started with the Visualizer and see how it works is to select from a range of more than 40 different pre-set scenes for every room in the house.
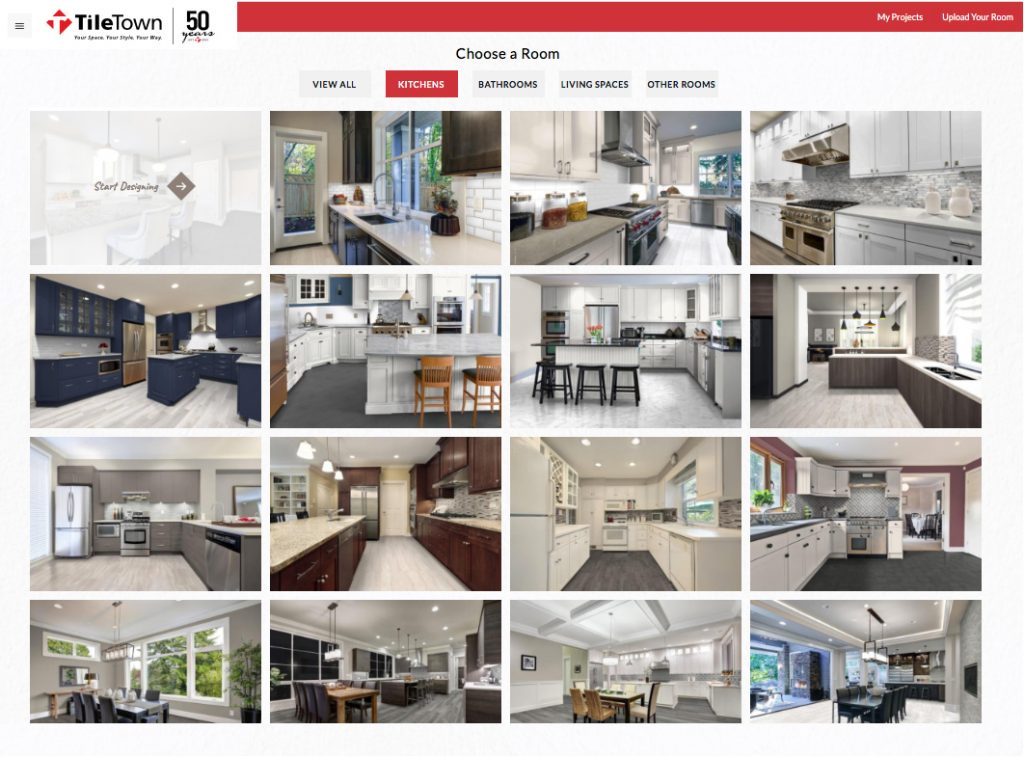
Once you select a scene you can start designing by instantly swapping out options for flooring and wall coverings and paint, as well as different accents depending on which room you’ve chosen. For example, in kitchen scenes, you’ll be able to try different backsplashes, countertops, and cabinets.
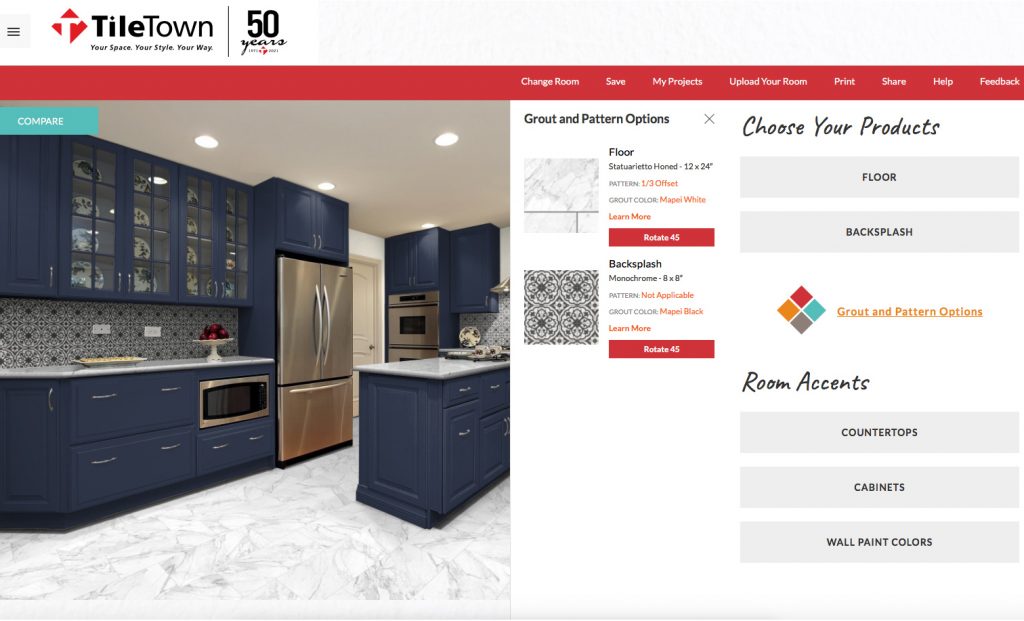
While playing around with options in a pre-set scene won’t show you exactly how different style choices will look in your home, it’s a fast and easy way to find the combination of styles and colours you might want to try in your next project.
Upload an image
For a clearer idea of how your style choices will look in the specific space you’re designing or renovating, you can select the “Upload an Image” option from the Visualizer’s main page.
After your image is loaded, you’ll be able to select from a range of tile options for the floor and wall. The Visualizer will automatically map floor area and walls but in some cases, you’ll want to click the “Edit Image” button to fine-tune things.
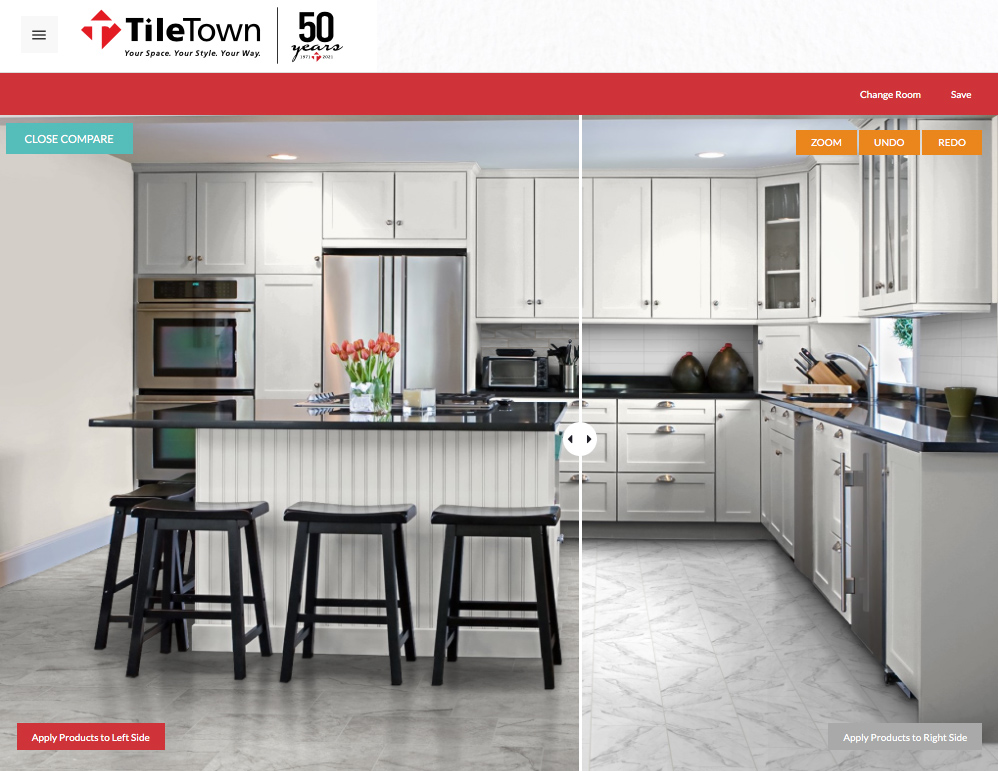
With both the pre-set scenes and your own images, you can also instantly compare different style combinations. Click the “Compare” button and a handy slider will appear over your scene, allowing you to swipe back and forth and instantly compare different options.
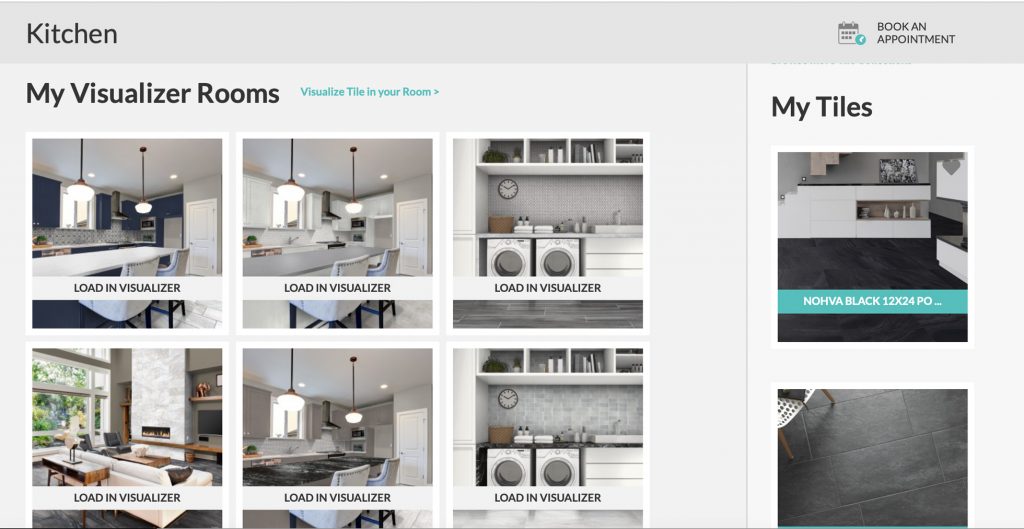
Save your projects for later
As you’re gathering ideas and testing out different combinations of tiles and other accents, you can either save your scenes for later reference, print them out, share them to social media, or email them.